Best Photo Spots for Nairobi National Park Photography: 5 Locations Worth the Shot
Nairobi National Park photography splits cleanly into two categories that most guides never separate: the shots of the wildlife itself, and the shots you can only get from inside a moving safari vehicle, close enough that no footpath or fence could put you there instead. This page names the five spots worth planning a morning around, with exact coordinates, a clock window rather than a vague daypart, and what each one actually costs in time and fees. It also covers the part every generic photo-tips list skips: camera settings for this specific dust and light, the real rule on drones, and which tours actually reach the spots that need one. Compare every photo-friendly Nairobi zoo tours option before you book.
Quick answer
The single best frame for Nairobi National Park photography is the northern plains skyline stretch, where wildlife and Nairobi's skyline share one composition, a shot that exists nowhere else on earth. Photography here splits two ways: the shots of the animals crossing that plain, and the shots you'll only get from inside a moving safari vehicle, close enough that no fence or footpath could ever put you there instead.
Key takeaways
- The northern plains skyline stretch is the single frame worth planning your morning around
- Every spot on this page has a numbered pin on the map below, with tour-only stops marked separately
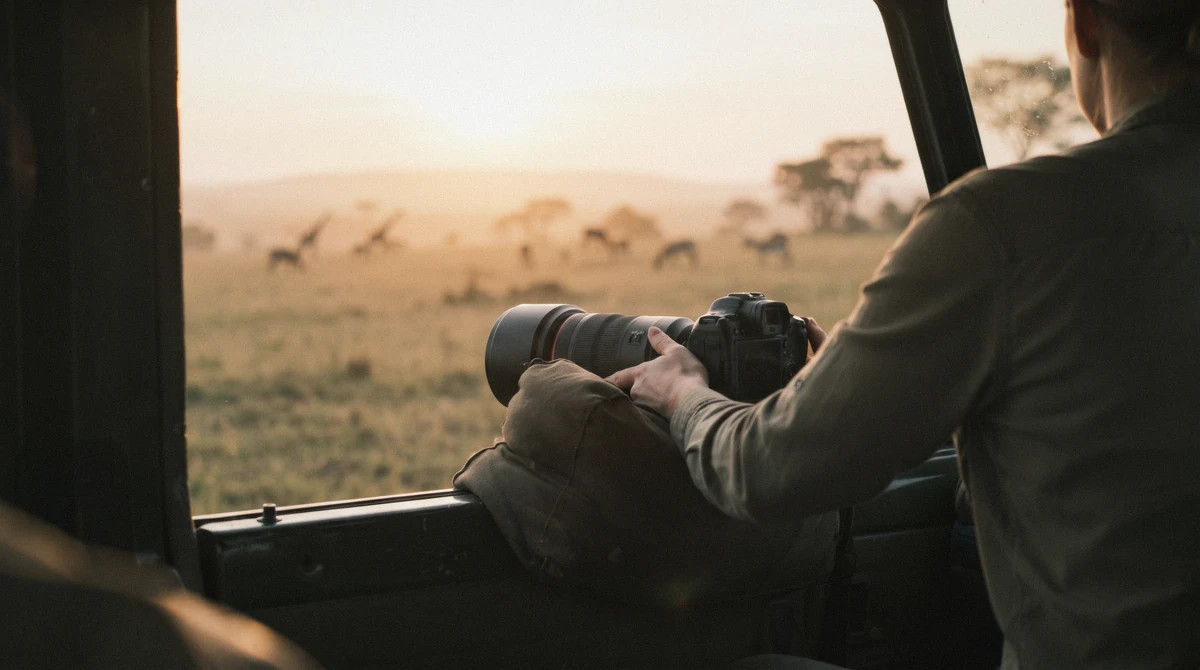
- The shot from inside the vehicle, a beanbag braced over the window sill, beats anything a tripod gets from the ground
- Nairobi sits almost on the equator, so the best light window barely shifts through the year, first light after the 6:00 gate opening is the one constant
- A drone will not help here, Kenya Wildlife Service parks ban them without a permit casual visitors will not get
Photo Spots at a Glance
Every spot below as one row, plus a sixth row for the shots you take from inside the vehicle itself, since that angle deserves its own line even though it isn't a single fixed location.
| Spot | Best time | The shot you get | How to get there |
|---|---|---|---|
| 1. Northern plains skyline stretch | 6:15 to 7:00, first light | Wildlife silhouetted against Nairobi's skyline | By vehicle, standard park entry |
| 2. Ivory Burning Site Monument | 8:00 to 9:00, soft cross-light | A conservation-history landmark with open plains behind it | By vehicle on the plains circuit, standard park entry |
| 3. Hippo Pools ranger walk | 8:30 to 9:30, mid-morning | Water-level hippo shots framed by yellow fever trees | Short guided walk from the vehicle drop point, standard park entry |
| 4. Impala Observation Point | 6:15 to 8:00, holds until mid-morning | A raised, wide view over the plains for herd shots or compression | By vehicle, short walk up to the platform, standard park entry |
| 5. Giraffe Centre platform | Afternoon, from about 15:00 | Eye-level giraffe portraits at the feeding rail | Separate stop by vehicle, its own admission (about $15) |
| From the vehicle, everywhere else | The full first 60 to 90 minutes after the 6:00 opening | Whatever crosses the track, shot low and close through the window | Every game drive, no separate trip needed |
None of these spots require a special permit for personal photography, and every one of them sits within a standard morning circuit except the Giraffe Centre, which is its own attraction with its own gate.
Map of the Best Photo Spots
Spots 1 through 4 sit inside the park itself and are reached on any standard game drive. Spot 5, the Giraffe Centre, is a separate attraction with its own admission, marked here in gold.
The 5 Best Photo Spots
1. Northern Plains Skyline Stretch
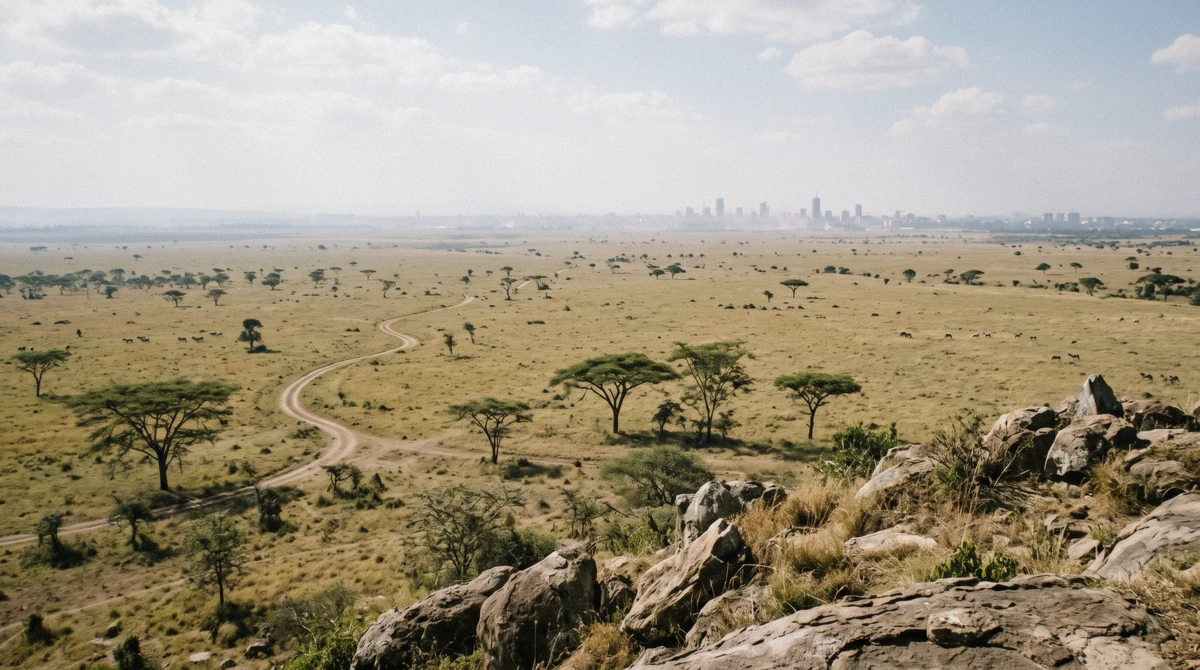
The shot you get: wildlife, zebra, giraffe or, on a good morning, a rhino, crossing open grass with Nairobi's high-rises rising small and hazy on the horizon behind it, the one composition no other national park on earth can offer. Best time: arrive at the gate for 6:00, the compression window runs roughly 6:15 to 7:00 while the air is still cool and haze hasn't thickened over the skyline. GPS: -1.36, 36.83, roughly 10 to 15 minutes' drive north of the main gate.
Fee and rules: covered by standard park entry, no separate permit, stay seated while the vehicle is moving. No physical hazard beyond ordinary vehicle safety.
2. Ivory Burning Site Monument
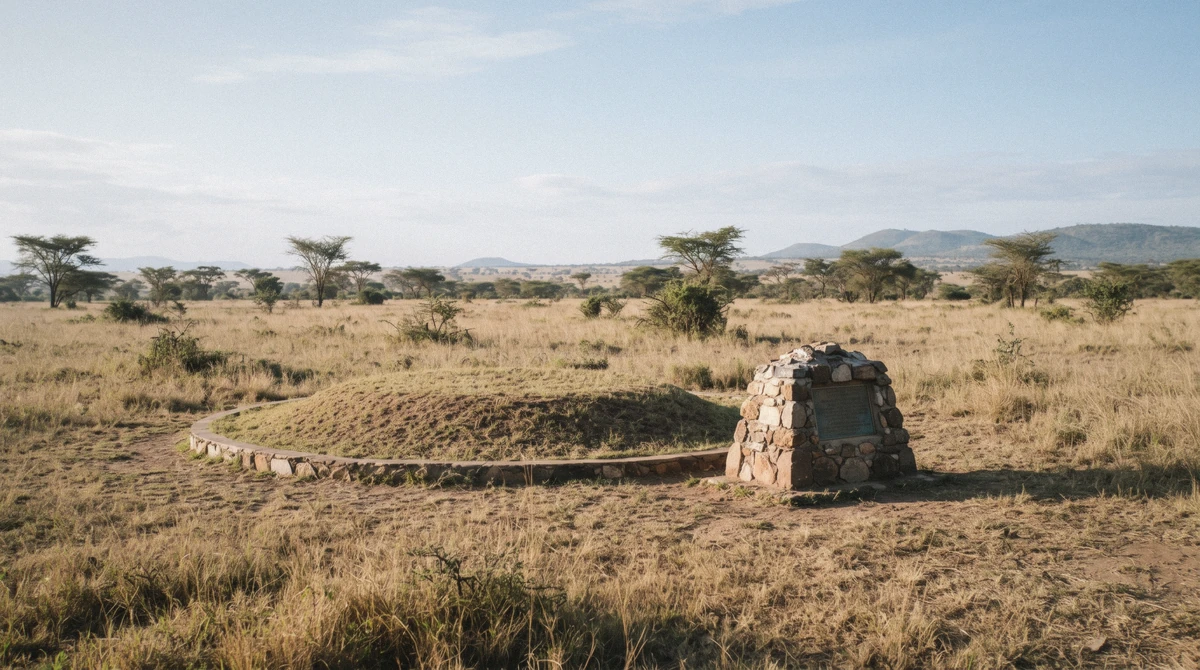
The shot you get: the monument itself with open plains stretching out behind it, a conservation-history frame rather than a wildlife one, and a genuinely different kind of photograph from everything else on this list. Best time: reachable any time the park is open, soft cross-light between 8:00 and 9:00 works best on the monument's face. GPS: -1.363, 36.812, about 10 minutes from the main gate on the way to the plains circuit.
Fee: standard park entry, no extra charge. Crowd workaround: rarely busy, most vehicles pass through without stopping at all. The full-day combination tour routes past this monument on its way to the open plains, worth asking your guide for two minutes to stop properly.
3. Hippo Pools Ranger Walk
The shot you get: water-level hippo shots, ripples and ears breaking the surface, framed by yellow fever trees, the only spot on the entire circuit photographed on foot rather than from a vehicle. Best time: the ranger-led walk usually runs mid-morning, around 8:30 to 9:30, while hippos are still visible near the surface before the day's heat pushes them fully under. GPS: -1.398, 36.887, a short walk from the vehicle drop point on the dams loop.
Fee and rules: covered by standard park entry, a ranger escort is mandatory here and the marked path stays marked, both for hippo safety and your own.
4. Impala Observation Point
The shot you get: a raised, wide view over the plains, good for a full herd in one frame or a compressed skyline shot with a longer lens. Best time: the same 6:15 to 8:00 window as the plains stretch works best, though the platform holds decent light later into mid-morning than most spots on this list. GPS: -1.373, 36.845, a short walk up from a vehicle stop on the plains circuit.
Fee: standard park entry. Crowd workaround: quieter than the main gate area, rarely more than one other vehicle here at a time. Private tours can hold this stop as long as the light is working, since the schedule belongs to your group alone.
5. Giraffe Centre Platform
The shot you get: eye-level giraffe portraits at the feeding rail, the closest full-frame animal portrait on this entire list and the one spot where the subject is genuinely at arm's length. Best time: afternoon light is softer here than a midday visit, arrive by around 15:00 for a calmer platform. GPS: -1.375, 36.746, a separate stop about 20 minutes from the park's main gate.
Fee: its own admission, roughly $15, separate from park entry and covered on fee-inclusive combination tours. Crowd workaround: school-holiday weekend mid-mornings mean a real queue for the platform, an afternoon visit avoids it entirely.
Photos From the Vehicle
This is the section that actually explains why people book a vehicle in the first place rather than trying to photograph this park on foot. Ground viewpoints like the Ivory Site monument and Impala Observation Point are real and free once you're inside the gate, but the low-angle, close, animal-eye shot beside a resting rhino or a lion pride flattened in the grass only exists from inside a vehicle that's actually permitted on the park's track network. Nobody is allowed to park on foot near a sighting like that, so the vehicle isn't a convenience here, it's the only way the shot exists at all.
Where to sit matters more than most people expect. A window seat on whichever side the guide favors for that morning's route beats the middle bench every time, and a pop-up roof gives a genuinely different angle than shooting through glass, standing braced two-handed against the frame rather than free-standing, since the ride is noticeably rougher on the dams loop than the smoother main circuit.
Shutter speed matters more than anything else you'll read in a generic tips list. Anything moving at pace, a fleeing gazelle, a cheetah accelerating, needs at least 1/1000 of a second, and burst mode catches the one frame in ten where the animal's head and legs land where you want them. Even parked-adjacent shots benefit from a fast shutter, since engine idle and a shifting vehicle add more motion than a photo taken standing still on solid ground.
The first 60 to 90 minutes after the 6:00 gate opening is the golden window this whole park runs on, low light, cooler air, and animals still active before the heat settles in. A private tour is worth the price difference specifically for photography, since the pace and the lingering time at any one sighting belong entirely to your group rather than a shared itinerary moving on after a few minutes. The layover safari compresses the same golden window into a shorter morning for anyone working around a flight.
Camera and Phone Settings That Work Here
The conditions here are specific: dust that settles on a lens fast, strong low light in the first hour that flattens to a hazy white by mid-morning, and real vehicle motion even at a standstill. A fast shutter, 1/1000 to 1/2000 of a second, and continuous or burst mode handle the motion problem better than any composition trick. A mid-range zoom, something in the 70 to 300 millimeter range on a standard camera, covers both the distant rhino and the closer skyline compression shot without swapping lenses in the dust, which is worth avoiding entirely if you can help it. A beanbag or a rolled fleece jacket over the window sill braces a longer lens far better than a tripod ever could inside a moving vehicle.
A phone handles most of this fine too. Skip digital zoom entirely and crop the native photo afterward instead, since a digitally zoomed phone shot degrades faster than a cropped one. Use portrait mode sparingly, since it struggles with anything moving, and go easy on HDR at dawn specifically, since it can flatten the shadow detail that makes early light worth chasing in the first place. Brace the phone against the roof frame rather than holding it free in open air.
One honest note on editing: the photos we reference on this site are lightly color-corrected for clarity, not heavily saturated. A real Nairobi morning looks hazier and dustier than the postcard version, and setting that expectation now saves a disappointed first hour. Cold mornings and long days both drain batteries faster than expected, so a spare kept in a warm pocket earns its place in any bag. What we actually shoot this on: a simple mirrorless body with one zoom lens and nothing else, genuinely all this park calls for.
Rules, Etiquette and Drones
Kenya Wildlife Service sets the real rules here, and they exist because this park sits closer to a city than any other on earth. There is no single published minimum distance we can point to for this specific park, so the honest guidance is to let your guide position the vehicle and never ask to get closer than they're comfortable with. No flash photography near wildlife, ever, and engines stay off once a guide has settled at a sighting.
Drones are effectively off the table for a casual visit. Flying one over the park requires both a Kenya Wildlife Service permit and separate civil aviation approval, a process that takes days rather than minutes, which rules out anything spontaneous on the morning of your tour.
A tripod is dead weight inside a moving vehicle, and a beanbag or rolled fleece does the job better anyway. The one place a tripod genuinely works is the Hippo Pools ranger walk, since it's the single stop on the whole circuit where you're actually standing on solid ground.
Personal photography is free everywhere on this list. Commercial or professional shoots, anything involving a paid session or a crew, typically need advance permission from Kenya Wildlife Service, and we don't have a confirmed fee figure to quote here, so anyone planning a commercial shoot should contact KWS directly well ahead of the date rather than assume a number.
Light in This Park: The Practical Physics
Golden hour
Nairobi sits close enough to the equator that sunrise holds steady between 6:15 and 6:45 through the whole year, no long summer evenings or short winter mornings to plan around. The best light runs the first 60 to 90 minutes after that, then returns again after about 16:30 as the sun drops back toward the horizon.
Where the sun rises
The sun comes up over the Athi plains to the east, so shooting the northern skyline stretch at dawn puts the light to the side of the frame rather than behind it, good for texture on both the animals and the grass. Shooting straight east means shooting into the sun, which turns most subjects into a silhouette, a real option if you frame for it on purpose, less useful if it catches you off guard.
Dust, haze and the 10:00 wall
Once the morning passes 10:00, the light flattens and heat shimmer starts working against any long lens, softening detail past a short distance. Dry-season dust actually helps at dawn, adding a warm glow to low light, then works against you by midday, when the same dust turns the air hazy and dulls contrast.
Rainy season pay-off
From March through May, the light trades warmth for drama: heavier skies, saturated green after the rain, and tracks with far fewer vehicles on them. Gear needs more care in this window, a dry cloth kept handy between showers keeps a lens or a phone screen clear.
Gear That Earns Its Seat
None of this needs to be expensive, but a few honest choices change what you come home with.
- A 200 to 400 millimeter zoom does the actual wildlife work here, close enough for a resting lion without needing the vehicle to get any nearer
- A 70 to 200 millimeter lens covers the skyline compression shot well without the weight of a longer zoom
- One wide lens earns its place for the landscape frames, the plains, the skyline, the monument
- A phone camera wins at the Giraffe Centre and for landscapes, and loses badly on anything distant, since a rhino or a cheetah across open grass asks more of a lens than a phone sensor can give
- A beanbag braced over the window sill steadies a long lens better than a tripod ever could inside a moving vehicle
- A spare battery kept in a warm pocket earns its place too, since a cold dawn drains one faster than expected
Settings That Work Here
A short list, worth reading once before the drive rather than fumbling with mid-sighting.
- 1/500 of a second or faster for anything moving, 1/1000 for birds in flight
- f/8 holds enough depth for a landscape frame, the skyline stretch or the monument
- Auto-ISO capped near 3200 keeps a dawn shot usable without excessive grain
- Underexpose slightly against bright open grass, it protects highlight detail that's hard to recover afterward
- Burst mode earns its keep at any behaviour moment, a head turn, a stride, a wing lift
Photography Mistakes We See Every Week
Small habits, and every one of them is an easy fix.
- Shooting through a dirty or closed window instead of opening the hatch or asking to crack the window
- Standing up before the vehicle has actually stopped
- Shooting at noon and running straight into the flat light described above
- Chasing every sighting instead of working one properly while the light is good
- Forgetting that the skyline shot needs a long lens, not a wide one, to compress the distance between the animal and the buildings behind it
- Using flash anywhere near an animal
A 3-Hour Photo Route
One way to sequence a morning around the light rather than around a fixed circuit. This is close to the private tour's natural route, since holding each stop for the light takes a pace only a private booking gives you.
-
6:00
Arrive at the gate
As it opens
-
6:10
Northern skyline stretch
The light still sits to the side of the frame
-
7:30
The open plains
Golden light and the best odds for animals in the open
-
8:30
The dams
Water reflections while the surface is still calm
-
9:15
Hippo Pools walk
The one stop on foot
-
9:45
Back out
Before the light turns flat
Which Tours Get You to These Spots
Spots 1 through 4, the northern plains stretch, the Ivory Burning Site Monument, the Hippo Pools walk and Impala Observation Point, all sit inside a standard park circuit and are covered on any game drive. The shared morning game drive covers the plains stretch and the monument in one loop, and the layover safari fits the same core circuit into a shorter window for anyone working around a flight.
Spot 5, the Giraffe Centre, needs its own stop with its own admission. The half-day Giraffe Centre and orphanage tour or the full-day combination both add it onto a park morning without a separate trip.
For anyone who wants to hold a sighting as long as the light allows rather than move on with a shared vehicle's fixed schedule, a private tour is worth the price difference. No tour on this list includes a dedicated photography service, so bring your own gear following the settings guidance above.
Frequently Asked Questions
What's the best place to photograph wildlife in Nairobi National Park?
The northern plains skyline stretch, where wildlife and Nairobi's skyline share one frame. It's the single composition worth planning a morning around, and it's covered on any standard game drive.
Can you take photos during the game drive?
Yes, with no restriction beyond the standard rule of no flash near wildlife at close range. Both phone and camera photography are fine from inside the vehicle throughout the drive.
What's the best time of day for photos in Nairobi National Park?
The first 60 to 90 minutes after the 6:00 gate opening, when light is low and warm and the plains haven't yet filled with vehicles or the day's haze.
What time does the sun rise in Nairobi National Park?
Between 6:15 and 6:45 all year, since the park sits close enough to the equator that sunrise barely shifts by season. That stability is exactly why the 6:00 gate opening lines up with first light in every month.
Should I bring a proper camera, or is my phone enough?
A phone handles wide shots and the Giraffe Centre portraits well. For a distant rhino or cheetah, a camera with a mid-range zoom does noticeably more than any phone's digital zoom, which is worth avoiding in favor of a native-resolution crop afterward.
Is a phone camera enough for a Nairobi safari?
It depends on what you're photographing. For the Giraffe Centre portraits and any landscape frame, a phone does the job well. For a distant rhino or cheetah across open grass, a phone's digital zoom falls short of what a camera with a proper lens can pull in, so pack a camera too if wildlife close-ups matter to the trip.
Are drones allowed in Nairobi National Park?
Not without a permit. Kenya Wildlife Service approval and separate civil aviation clearance are both required in advance, which rules out flying one spontaneously on the day of your visit.
How close can you get to the animals for a photo?
As close as your guide judges safe and undisturbing for that specific sighting. There's no single published distance figure for this park, so trust the guide's positioning rather than asking to move closer.
Can I get good wildlife photos without booking a tour?
Partly. Self-driving your own vehicle with a park entry ticket covers spots 1 through 4 well. The Giraffe Centre needs its own admission either way. A guided tour still improves the odds, since a guide knows where sightings have clustered that specific week.